 FA+
FA+
2835
Views
Views
36
Favorites
Favorites
Category
All / General Furry Art
Species Rabbit / Hare
Size 1495 x 795
File Size 286.9 kB
Report this content
More from Ashnar


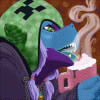
Well, with a bit of time, I've stuffed this cute Jackalope, Phina, into her summer bathing suit design from Meganechu. I had to adjust, squish and squeeze her top till her boobs fit and didn't always pop out anytime I tweaked something. .. I'm not sure how you girls do it..
*warning, contents under pressure.*
For Reference: Meganchu's Original Concept art for this bathing suit is here: http://www.furaffinity.net/view/8303753/
I'll Pose and render something tomorrow .. Together with Opal who got her lovely bathing suit last weekend.
Phina and 3D model work using Blender by Ashnar
Bathing Suit Design by Meganechu
Phina's Design by Tsampikos
*warning, contents under pressure.*
For Reference: Meganchu's Original Concept art for this bathing suit is here: http://www.furaffinity.net/view/8303753/
I'll Pose and render something tomorrow .. Together with Opal who got her lovely bathing suit last weekend.
Phina and 3D model work using Blender by
 Ashnar
Bathing Suit Design by
 Meganechu
Phina's Design by
 Tsampikos
Category All / General Furry Art
Species Rabbit / Hare
Size 1495 x 795px
File Size 286.9 kB


Its Blender https://www.blender.org , no Daz here.. everything is from scratch, by hand, the hard way...


Oh yes, of course, Thats the best way to start any clothing layers, then heavily modify from there:
1) In wireframe mode, BoxSelect the general area of the mesh, and roughly de-select unneeded parts of the mesh.
2) Shift-D to duplicate the selected mesh area, then Shift-P to seperate the selected mesh area to a new object.
3) Exit Edit mode and select the new mesh object,
4) Enter Edit mode on the new object and scale it ALONG NORMALS (grow/shink) by a very small amount
Select verts, Duplicate and seperate them to a new object, Select the new object and then scale it along it's normals. Remove any materials and assign new ones. .. edit everything from there till its what you want.
Having a mesh structure that matches the character beneath helps prevent them from having wardrobe malfunction when animating and having, umm .. details .. pop throught the clothing. To help with this, the edges of the clothing are scaled closer to her surface than the center areas, it also gives the clothing a bit more defined shape in the light.
The edges here are extruded, then CTRL+ to selct to two new edge loops.. then extruded again into a square to form a ridged border.. Just a bit extra simple detail to play with light.


Comments