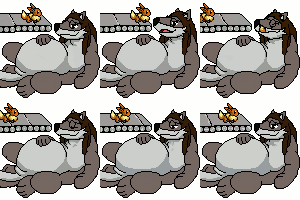
Hello~ As promised, here's a Gimp animation tutorial.
LINK TO FULL SIZE: http://img580.imageshack.us/img580/...../tutorialk.jpg
1. Open up a new canvas in Gimp. ON A NEW LAYER (not the background), draw your base sketch. This will serve as your base for the animation. I use the ink tool to draw my lines.
2. Duplicate your base sketch layer! That way, you can save time by not having to draw it out over and over.
3. Change the duplicate's opacity down. That will make it easier to see the changes you make to the frame. ALSO, hide the original layer. Make a NEW LAYER ABOVE THE DUPLICATE TO MAKE YOUR CHANGES ON. It just makes it easier. Erase on the duplicate the areas you change.
4. Right-click the layer you added the edits on. Click Merge Down.
*NOTE* If at any time you want to see how your animation is looking, click Filter > animation > playback. A little box will open up and you can play back your animation.
5. Continue on with steps 2 - 4 to get what you want. EXCEPT, with step 2, duplicate your LAST COMPLETED FRAME to get more fluid animation.
6. After getting the desired look, name your layers. Ex: frame01 (replace) (100ms). The (100ms) is the time that frame shows. Default is 100, but you can change it in increments of 50 (for most internet browsers).
7. After everything is all set, click File > save. Name your animation "filenamehere".gif. You NEED the .gif otherwise Gimp will save it as a .xcf! Click save as Animation > export. Make sure it's marked as Loop Forever, then save.
Your animation is complete!
I really hope this helps people. D:
LINK TO ANIMATION: http://www.furaffinity.net/view/4134550/
Category Artwork (Digital) / Tutorials
Species Unspecified / Any
Size 458 x 1280px
File Size 3.72 MB
If you have trouble reading it, I typed out the steps in the artist's comment. I created the tutorial using Sai, and Sai doesn't have any text tools.
I know, I could've used Gimp to create the actual tutorial, since it's a tutorial FOR Gimp and all.....buuut, I hate the fact you have to size everything down separately in Gimp before copy/pasting the screenshots on the tutorial. In Sai, you can add all the screenshots and size them all down without having 20 billion windows open at once. D: Just a little preference there.
Sorry about it being difficult to decipher.
Its ok, I'mjust a wii bit nit pick ever sense I took my graphic design class ^^;
I've never tried sai kinda weird they don't have text tool.
I just downloaded gimp haven't touched it yet.
My only experence I have is from photshop and illustrator ^^; sadly those programs are so damn expensive r.r
I've never tried sai kinda weird they don't have text tool.
I just downloaded gimp haven't touched it yet.
My only experence I have is from photshop and illustrator ^^; sadly those programs are so damn expensive r.r
Are you merging all of them? You're only supposed to merge the ones that have the redrawn lines to the layer you erased on. *Confusing wording, I know*
Or, when saving, are you clicking save as animation? When saving a .gif, it gives two options, one is "merge visible layers" and the other is "save as animation."
If you still need help, just lemmie know. Maybe screenshot it and put it on photobucket or imageshack and link me to it? (Screenshot with the layers clearly showing)

 FA+
FA+

![[Animation] Xormiku Snarl Colored](http://t.furaffinity.net/4255238@200-1488278723.jpg)
![[Animation] Xormiku Snarl](http://t.furaffinity.net/4134550@200-1488278723.jpg)


Comments