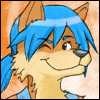
Old pic, so very old, from July 2004. That light ball spell was fun to make. This was a request, but it turned out to be an effective advertisement for my services too. ^_^
Caer © farx
farx
Caer ©
 farx
farx
Category Artwork (Digital) / Fantasy
Species Skunk
Size 933 x 733px
File Size 96.9 kB
This assumes you have PhotoShop, since that's what I used for this picture.
The light spell is comprised of 4 layers, arranged as shown:
+-OrbFire 2 (Screen, 100% opacity) <grouped>
Orbfire 2 mask (Normal, 50%)
<Character layers go here>
OrbCore (Normal, 100%)
OrbFire 1 (Screen, 60%)
1. Make a new layer set to screen. Fill the layer with black.
2. Add a lens flare where you want the spell effect to be.
3. Duplicate the spell layer a couple times until it's fairly bright, then merge down (Ctrl+J, Ctrl+E). Remember that you will be lowering the opacity later.
4. Select the smudge tool. Drag the mouse (or stylus) around in a swirling circular motion over the lens flare. Try to keep your movements as smooth as possible.
5. (optional) Drag some of the bright whitish light from the center up in a wavy tapering line so it looks a bit like fire. Once you're happy with the effect, duplicate the spell layer and lock both layers.
6. Create a new layer set to Normal. Group the unlocked spell layer to this new layer.
7. Select the smudge tool again. Check the box marked "Finger Painting" in the tool options bar.
8. Smudge, blot, and swirl to create highlights.
9. Play with the opacity of all three layers until they look good to you.
10. Make a new layer between the mask layer and the lower spell layer. Select the brush tool. Paint a white circle in the middle of the effect. If you feel the spell needs more of a glow, this is a good place to add it.

 FA+
FA+


Comments